
If your existing cabinets feel outdated or you no longer like the paint color, you may consider repainting the cabinet doors. This is a cost-effective way to completely enhance the look and feel of your kitchen for a fraction of the cost of a home renovation. However, before you start painting your cabinet doors, there are steps you'll need to take to ensure a flawless application.
In this article, we'll teach you how to paint cabinet doors and provide practical tips you can use to achieve a flawless finish. Here's everything you need to know:
Why Painting Cabinet Doors Starts With Proper Prep
Before you can start painting cabinet doors, you'll need to fully prep them. The prep stage is arguably the most important part of the process. If you forget to sand, prime, or fill the doors, you'll end up with an uneven finish. In some cases, the paint can also start to peel and chip away.
What You Need Before Painting Cabinet Doors
Before you can get started, gather all the necessary supplies. Here's what you'll need close by to begin this project:
- Gentle cleanser and a degreaser
- Tack cloths
- Painter's tape
- Wood Filler (Bondo 907 Glazing and Spot Putty or Elmer's Wood Filler Max White)
- 220-grit sandpaper
- Flexible-foam sanding sponge
- Brush and roller
- Primer (Choose a primer with the same base as the paint)
- Paint color of your choice
- Plastic bags
How To Paint Kitchen Cabinet Doors Step by Step
Ready to start the painting process? Here’s a step-by-step guide you can use to paint your kitchen cabinet doors at home.
Step One: Sanding The New Cabinet Doors
Lay the door on a flat surface, then lightly sand it with a flexible-foam sanding sponge or 220-grit sandpaper. Be sure to sand "with the wood grain" on the front, back, and sides. Remove any residual grit with a clean cloth (tack cloth is best) or a vacuum.
Step Two: Sealing and Priming
The sealing coat seals the wood, so when you're ready to paint, the paint adheres evenly. The primer can be applied with a brush or a roller. Try not to get paint all over the brush; dipping only about 1/2" to 1" into the paint is best. Also, between coats, you can place the brush in a plastic bag to keep it from drying out, and avoid cleaning it until the end of each day.
Match the primer with the paint you plan to use. If you use a latex (water-based) paint, use a latex primer. If using an oil-based paint, use an oil-based primer. Also, try to use a primer with a drying time of 30 minutes or less. White primer works best because it highlights the door's uneven areas more clearly. This allows you to spot (and correct) the areas that need filling before painting.
Step Three: Apply Filler
Once the first coat of primer is dry, you will be able to see some small, uneven areas, scratches, or dents in the wood. Now it's time for the filler. All hardwoods have voids, which cannot be seen until they are primed. Fillers must be sanded smooth after drying and then sealed with primer before painting to prevent the color from bleeding through.
After filling, sand the filled areas, remove the dust, and apply one last primer coat. When the primer has dried, lightly sand the doors and wipe them clean of any dust. If the final inspection doesn't show any unfilled scratches or small voids, you are ready to paint.
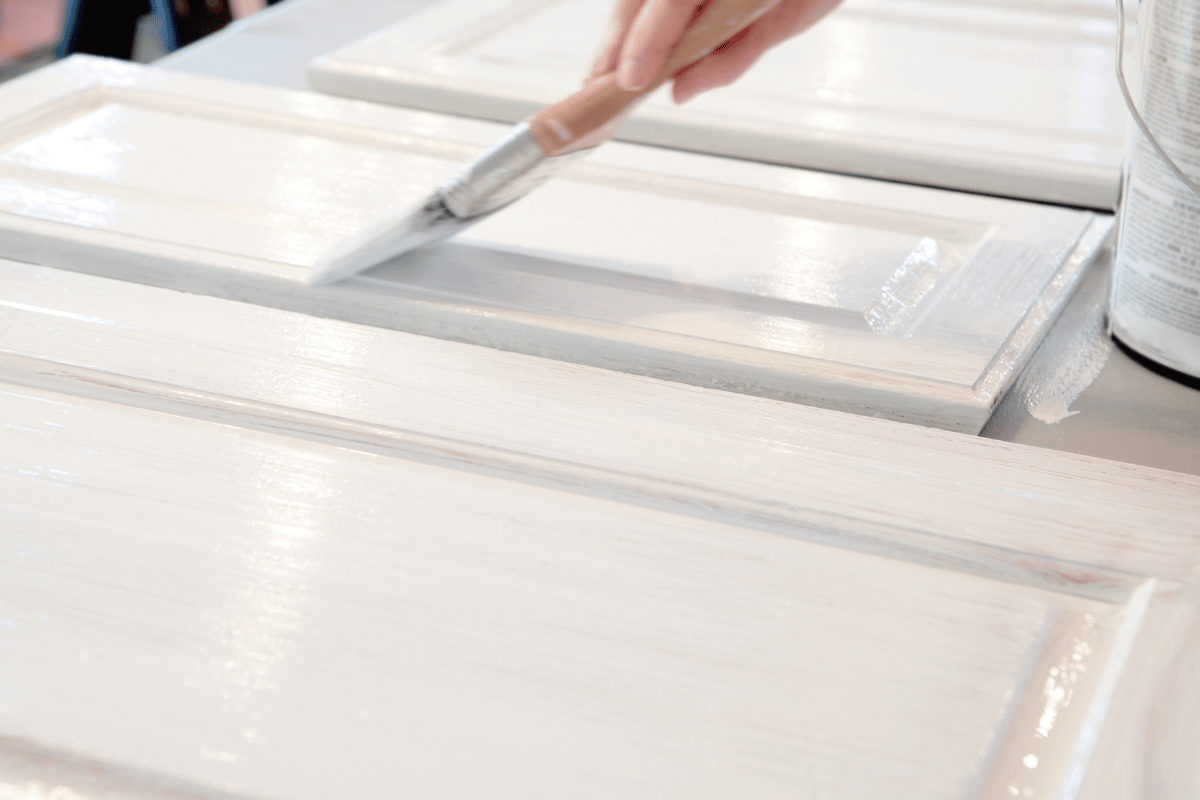
Step Four: Start Painting
Painting is the easiest phase of the project. But without going through the priming-sanding-filling-priming process, there would be little chance of obtaining truly great painted kitchen cabinet doors.
Using the same roller (for large areas) and paintbrush (to smooth and paint the smaller, more detailed areas) technique used in the primer step, apply your paint to the doors. There is no need to sand between paint coats, but it is a good idea to clean the brush between coats to prevent any dried paint from working its way into your finish.
Although the finish may look good after one coat of paint, two coats are typically applied to ensure durability. Just follow the directions on your paint (and primer) and follow the drying time recommendations.
Tips for Getting a Smooth Finish When Painting Cabinet Doors
Before you repaint your cabinet doors, ensure you have all of the tools, supplies, and tips to achieve a smooth finish. Here are five quick tips to keep top of mind:
- Fully clean the surface before the priming-sanding-filling-priming process. You'll want to wipe down the existing doors with warm water and a gentle soap. You may also need to use a degreaser to remove stubborn grease buildup.
- Use the Bondo 907 Glazing filler to fill any imperfections. This filler is orange, making it easier to see where you have filled.
- Avoid adding too much paint to the brush and roller. If the paint is dripping from the edges or the corners, you'll want to remove the excess before use.
- Paint the cabinet doors in a clean, dust-free location.
- After applying a coat of paint, let it dry completely before you apply another coat. This will help you achieve a smooth, flawless finish.
When To Repaint Cabinet Doors vs. Replace Them
Painting cabinet doors is an affordable DIY way to achieve an updated look. However, if your current cabinet doors show any signs of wear and tear, you may want to consider replacing them. Warping, swelling, and rotting are irreversible damage that can't be fixed with a fresh coat of paint.
If you like your kitchen layout and the cabinet boxes are in good condition, consider investing in replacement cabinet doors. This is an affordable alternative to a full remodel that will give you that updated look you're trying to achieve. You can also completely transform your space with different cabinet door styles, wood species, and paint colors.
SHOP PAINTED CABINET DOORS TODAY
Update Your Cabinets With the Right Door Solution
Learning how to paint cabinet doors is an effective way to enhance your home's look, for a fraction of the cost of a total remodel. However, if your existing cabinet doors show any signs of wear and tear, you'll want to consider replacing them.
At CabinetDoors.com, we specialize in high-quality, custom-made cabinet doors and drawer fronts. We also have a large selection of modern and traditional hardware options. Whether you need replacement cabinet doors or new hardware, we're a reliable source you can count on.
Cabinet Door Painting FAQs
Do you have to sand cabinets before painting them?
Yes, you need to sand your cabinets before applying paint. Sanding helps you achieve a smooth, even surface, so when you're ready to paint, the paint applies evenly.
Can you just paint over already-painted cabinets?
Yes, you can paint over already-painted cabinet doors. However, to achieve a smooth, even finish, you'll need to follow the priming-sanding-filling-priming process. This helps remove any grease, dirt, or oil on the door's surface. It will also make it easier for the paint to adhere to the door.
Is it better to brush or roll paint on cabinets?
For the best results, use a brush and a roller to paint cabinet doors. You can use the roller for the large surfaces and the brush for the smaller corners, frames, and intricate details.